
While you may believe that nail polish is the most crucial aspect of a great manicure, we’re here to tell you that it’s all about the cuticles. Whether at the salon or home, taking care of your cuticles is essential for keeping your nails and underlying skin safe and looking polished.
Quick Navigation
What are Cuticles?
The cuticle is a protective coating of skin that surrounds your nail and protects it from bacteria as it grows. Cuticles, on the other hand, will quickly become thick and overgrown. Cuticle remover liquid softens and extracts dead skin cells from the finger’s base, making it easy to clip or push back the cuticle for a flawless manicure canvas. In this article, we will provide you with complete details on how to use cuticle remover.
Quick Steps on How to Use a Cuticle Remover
Step 1- The Anatomy Of The Nails Should Be Recognized
Take a trip back to science class with us. Analyzing the nail anatomy diagram is the easiest way to classify the cuticles.
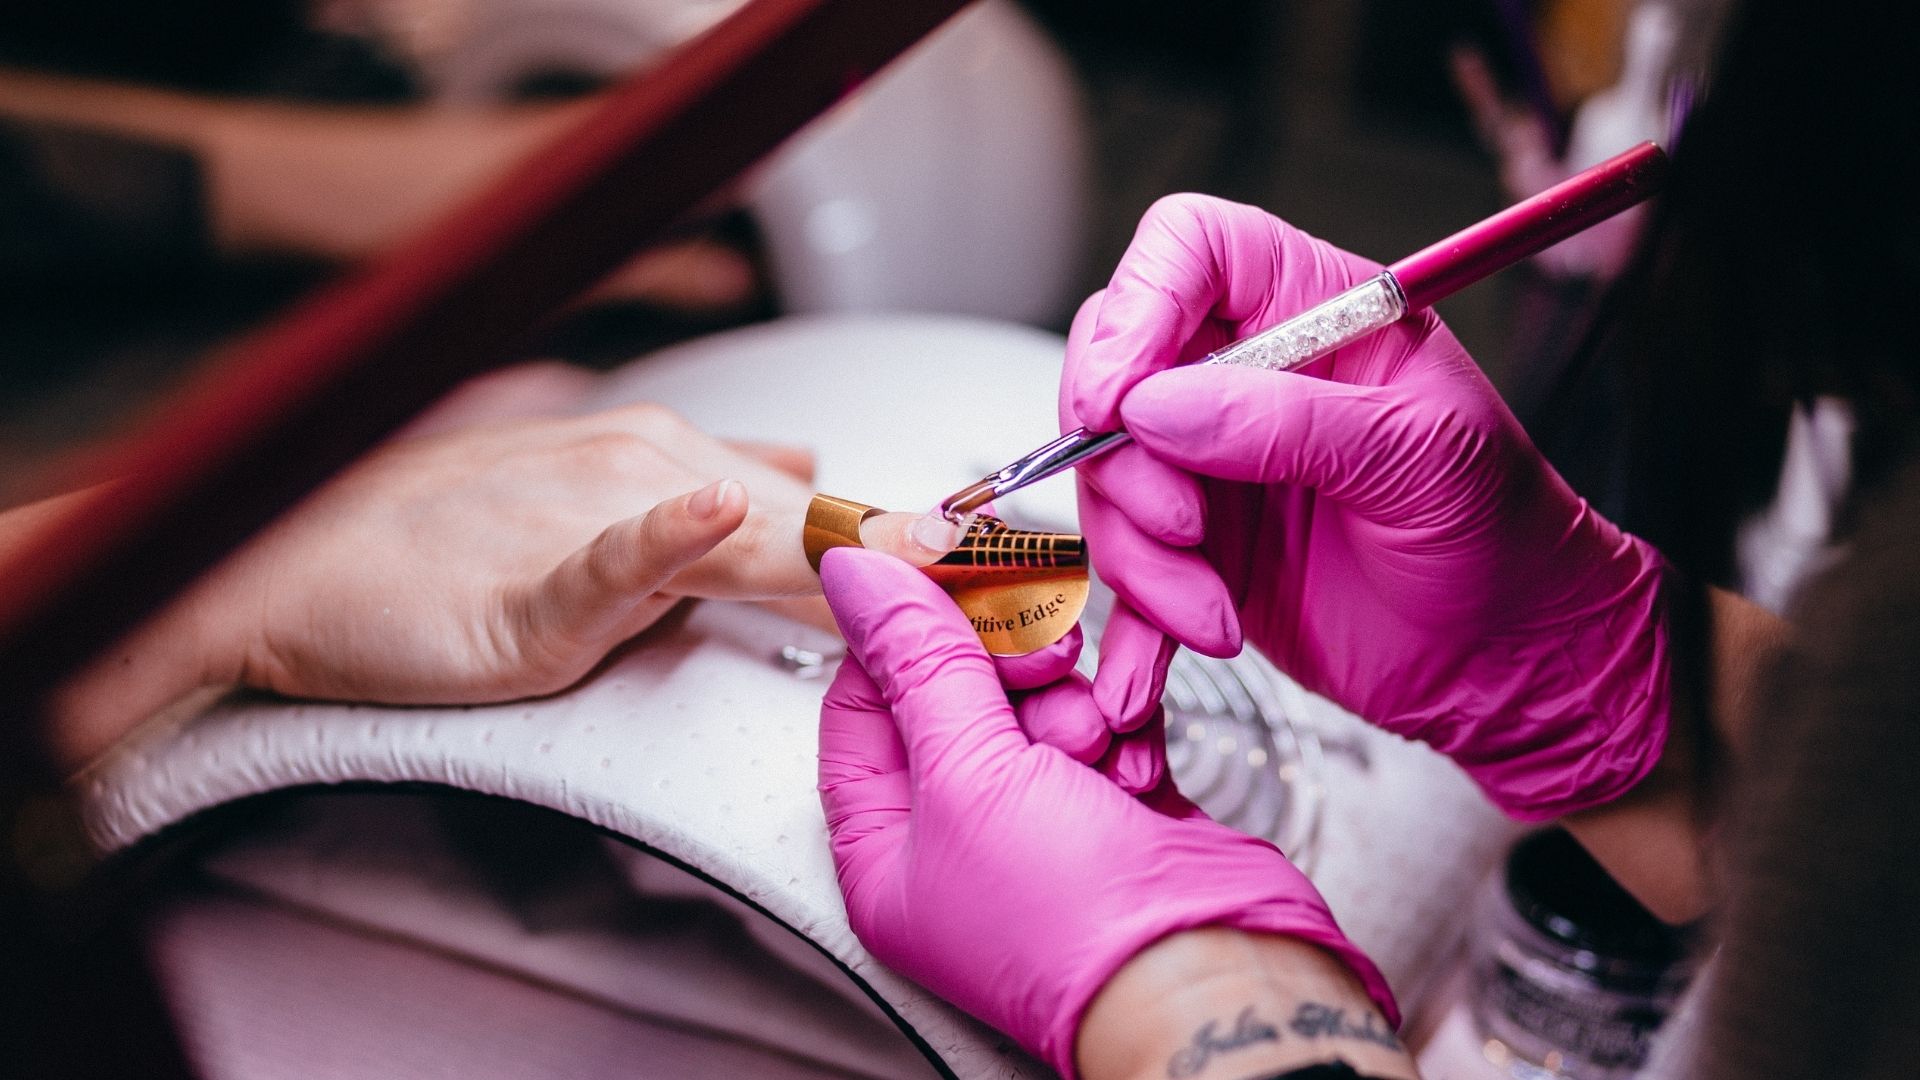
Step 2- Follow the Instructions for Using the Cuticle Remover
There are various forms of removers available. Please read the notes before using the one you have. Begin by dabbing a tiny amount onto your cuticles. To remove the cuticle and stretch it carefully, use a wood stick.
Step 3- Allow for a Maximum of 5 Minutes Before Pushing the Cuticles Back
This often depends on the type of remover used. However, it usually takes 2 to 5 minutes for it to settle. Cuticle cutting is highly discouraged because it can cause skin damage. Instead, use the wooden stick or a cuticle remover to force it out gently.
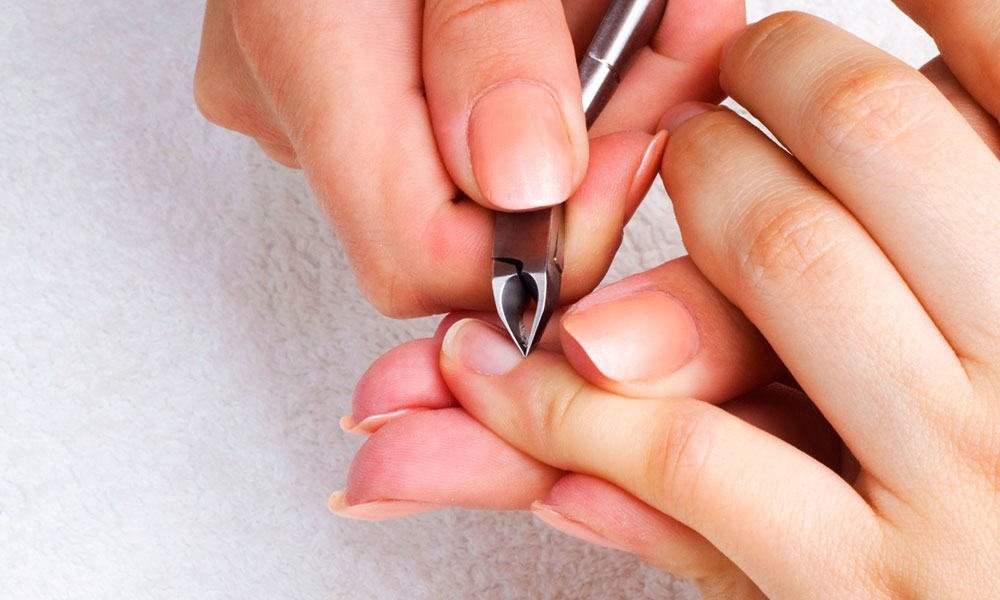
Step 4- Trimming with Cuticles Trimmers
Cuticles may be trimmed with special clippers, also known as cuticle cutters until they’ve softened. The pointed, plier-like design means that the delicate skin surrounding your nails is clipped with precision. Steel clippers can keep their sharpness for a more extended period. If you choose to keep the cuticles safe, softly press them back with an orange stick or a steel cuticle tool.
Step 5- Remove the Excess Cuticle Remover and Clean It
Wipe away any remaining remover and dead skin cells with a cotton cloth. After that, wash your hands.
Step 6- Apply Polish On The Nails After They Have Been Cleaned
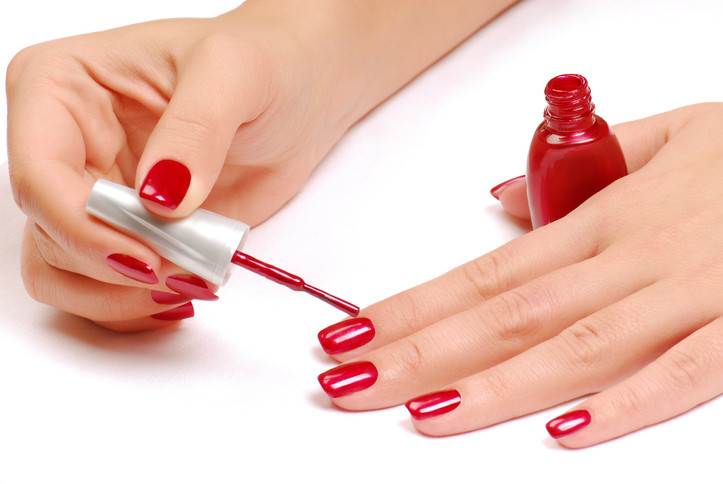
You should now add your nail polish after finishing your cuticle treatment. You can Experiment and make your own nail polish colors at home with some easily accessible resources.
Ultimate Cuticle Treatment
It would help if you took care of your cuticles for them to be attractive and secure. For example, you can moisturize the area of your nails regularly. Manicures are often necessary if you want your nails to appear healthy. Remember to enjoy a well-balanced diet and maintain a healthy lifestyle.
FAQ’s
1. What is the aim of using a cuticle remover?
a) Removes dead skin cells from the tips of the nails, b) Protects the nail bed from being poisoned, c) It improves the appearance of your nails and protects your cuticles from snagging.
2. How does a cuticle remover work?
Cuticle remover liquid softens and extracts dead skin cells from the finger's base, making it easy to clip or push back the cuticle for a flawless manicure canvas.
3. How do you use a cuticle remover tool?
A cuticle pusher is an essential nail instrument used in manicures and pedicures. It helps your nails grow stronger by pushing the skin from your cuticles back and away from your nails.
4. How long do you leave cuticle remover on?
Cuticle remover should be used on the nails for 4-5 minutes (or the time specified on the bottle) for it to work its magic.
5. How often should I use cuticle remover?
Depending on how much you paint your nails and the cuticle remover you use. Most are soft enough to use several days a week, while others can only be used once or twice per week.